
Dangerous Light
On a lost effect from the analog film era.
Welcome! Glad you could join us for another Thursday edition of the Animation Obsessive newsletter. This one’s all about light.
In January, we received an email from musician Josh Fagin (spktra is his stage name). He was about to drop an animated music video, Spirit Jumper, on which he’d spent five years. His goal: to create digital animation that looks authentically like the cel animation of three or four decades ago.
Fagin and his team (which included a Batman Beyond vet) got very, very close to the mark. Lately, he’s explained parts of their process in conversations with Cartoon Brew and Animation Magazine. It’s impressive work.
And most impressive of all, for us, is the light. Fagin’s video brings back a type of light essentially lost since the analog era. You know it when you see it; it jumps out immediately. He discovered something here.
We were curious about it and asked for a few details — a couple of sentences. Fagin surprised us by writing an article. The piece is so good that we’ve decided to publish it in full, and we’re thrilled to share it today.
Below, Fagin gets into the mesmerizing and little-understood technique of analog light in cel animation: the multiple exposures, the lens trickery and more. And he reveals how he revived this stuff for our time, on a computer — in enough detail to follow his thinking and (for the adventurous) even borrow his toolkit.
Let’s go!
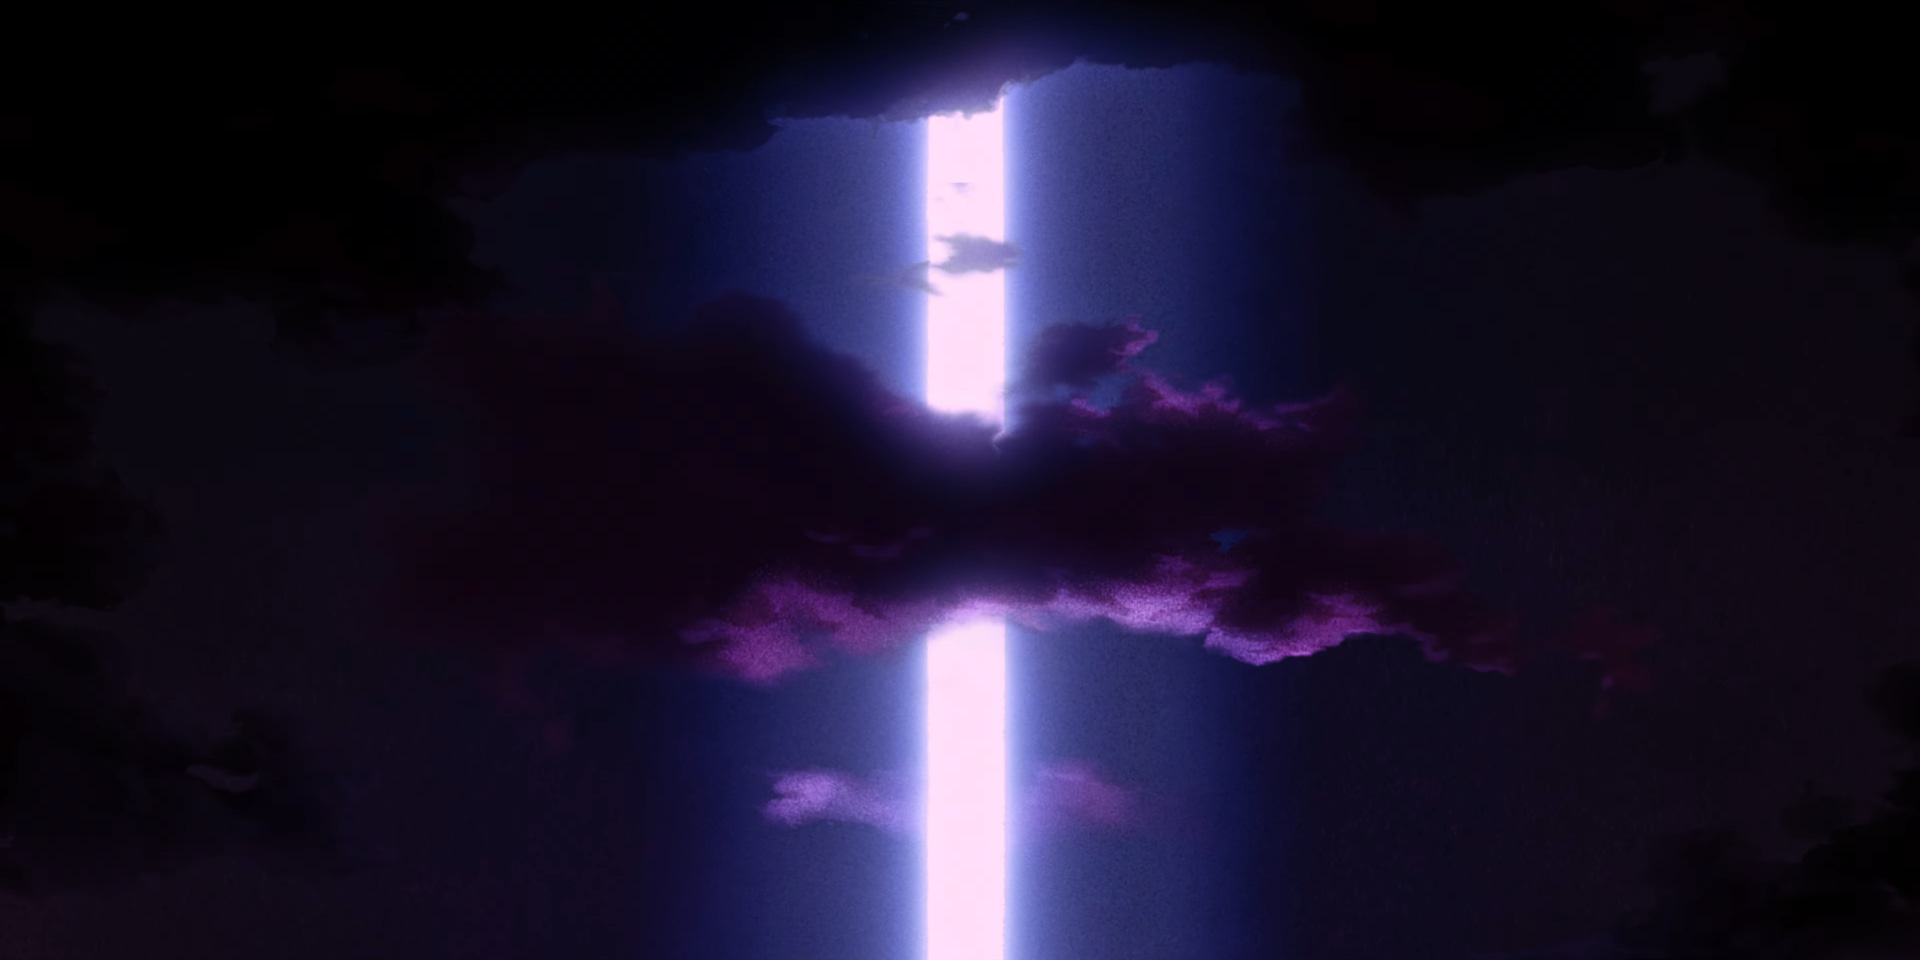
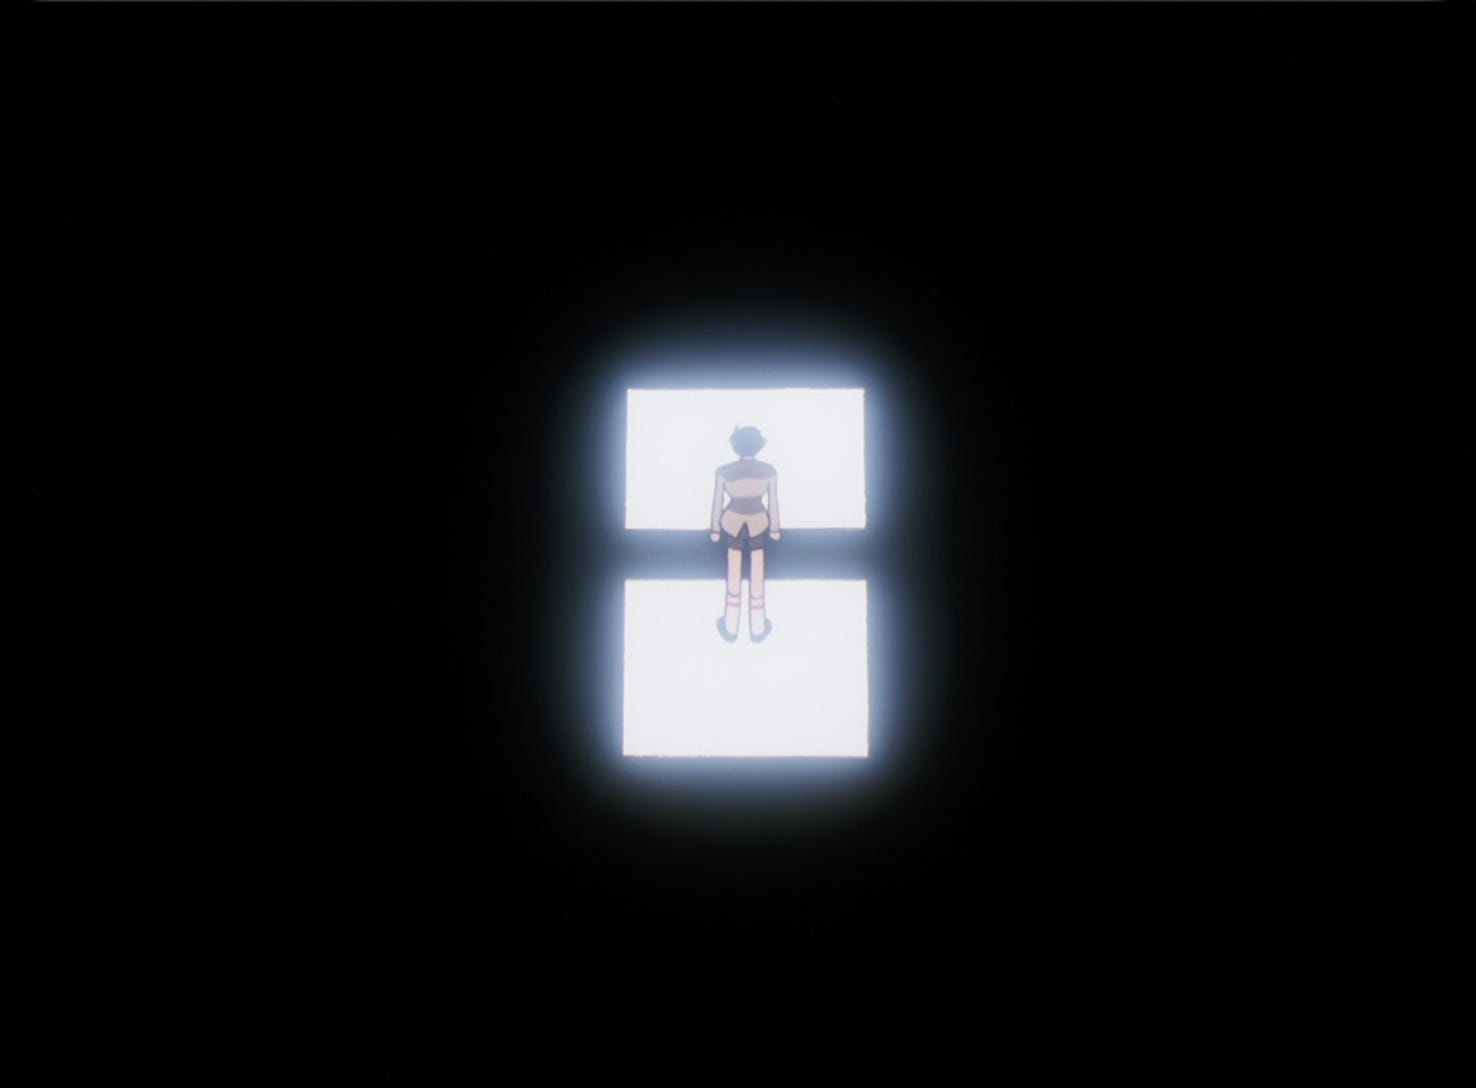
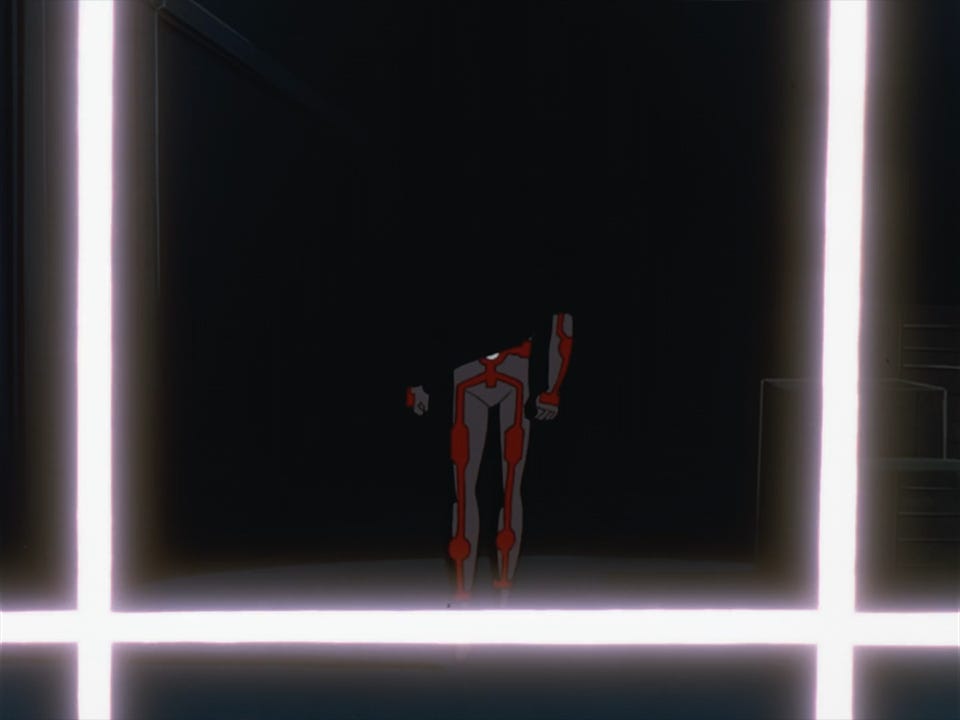
When you look at light effects in pre-digital animation, there’s a magic to them.
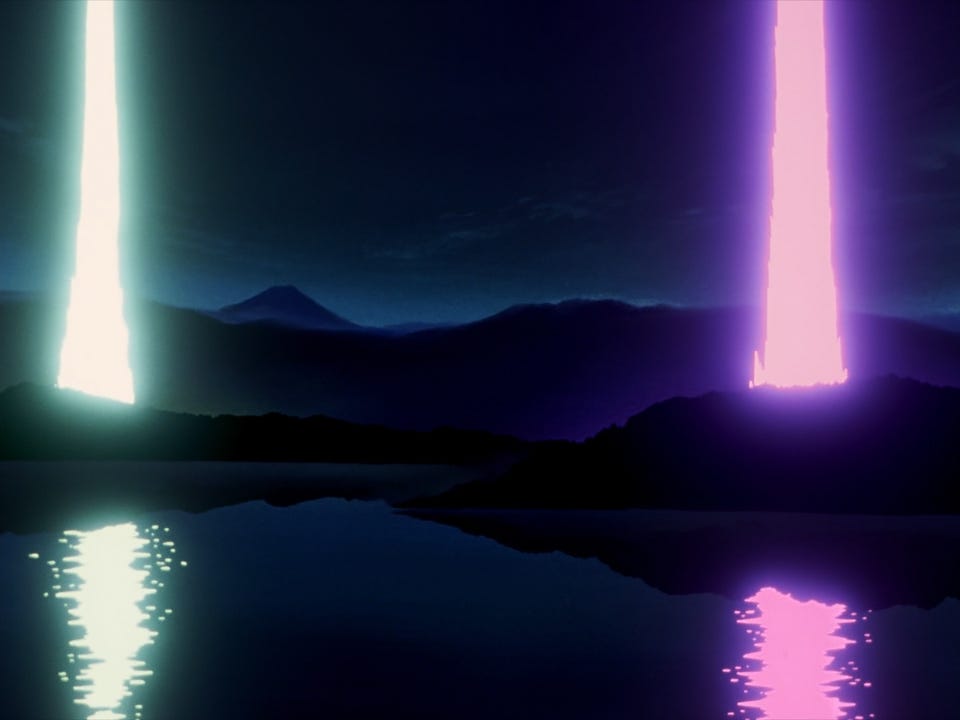
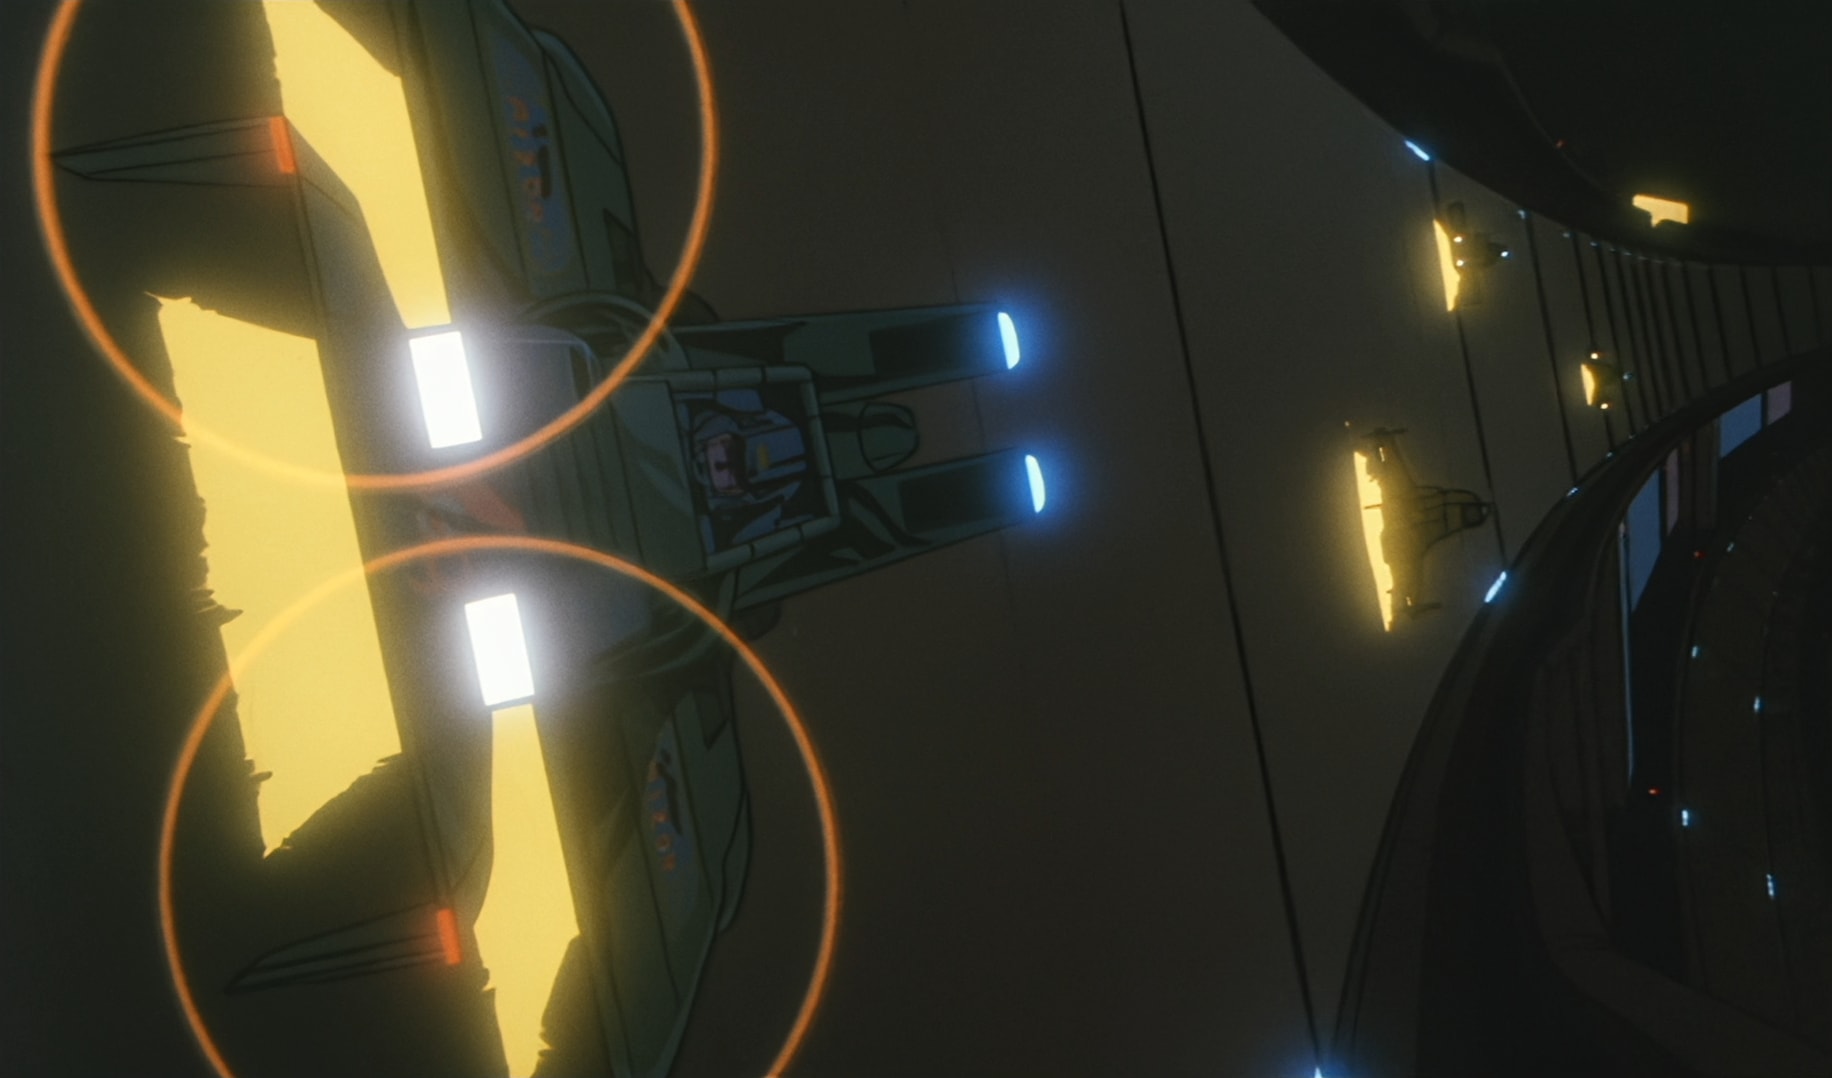
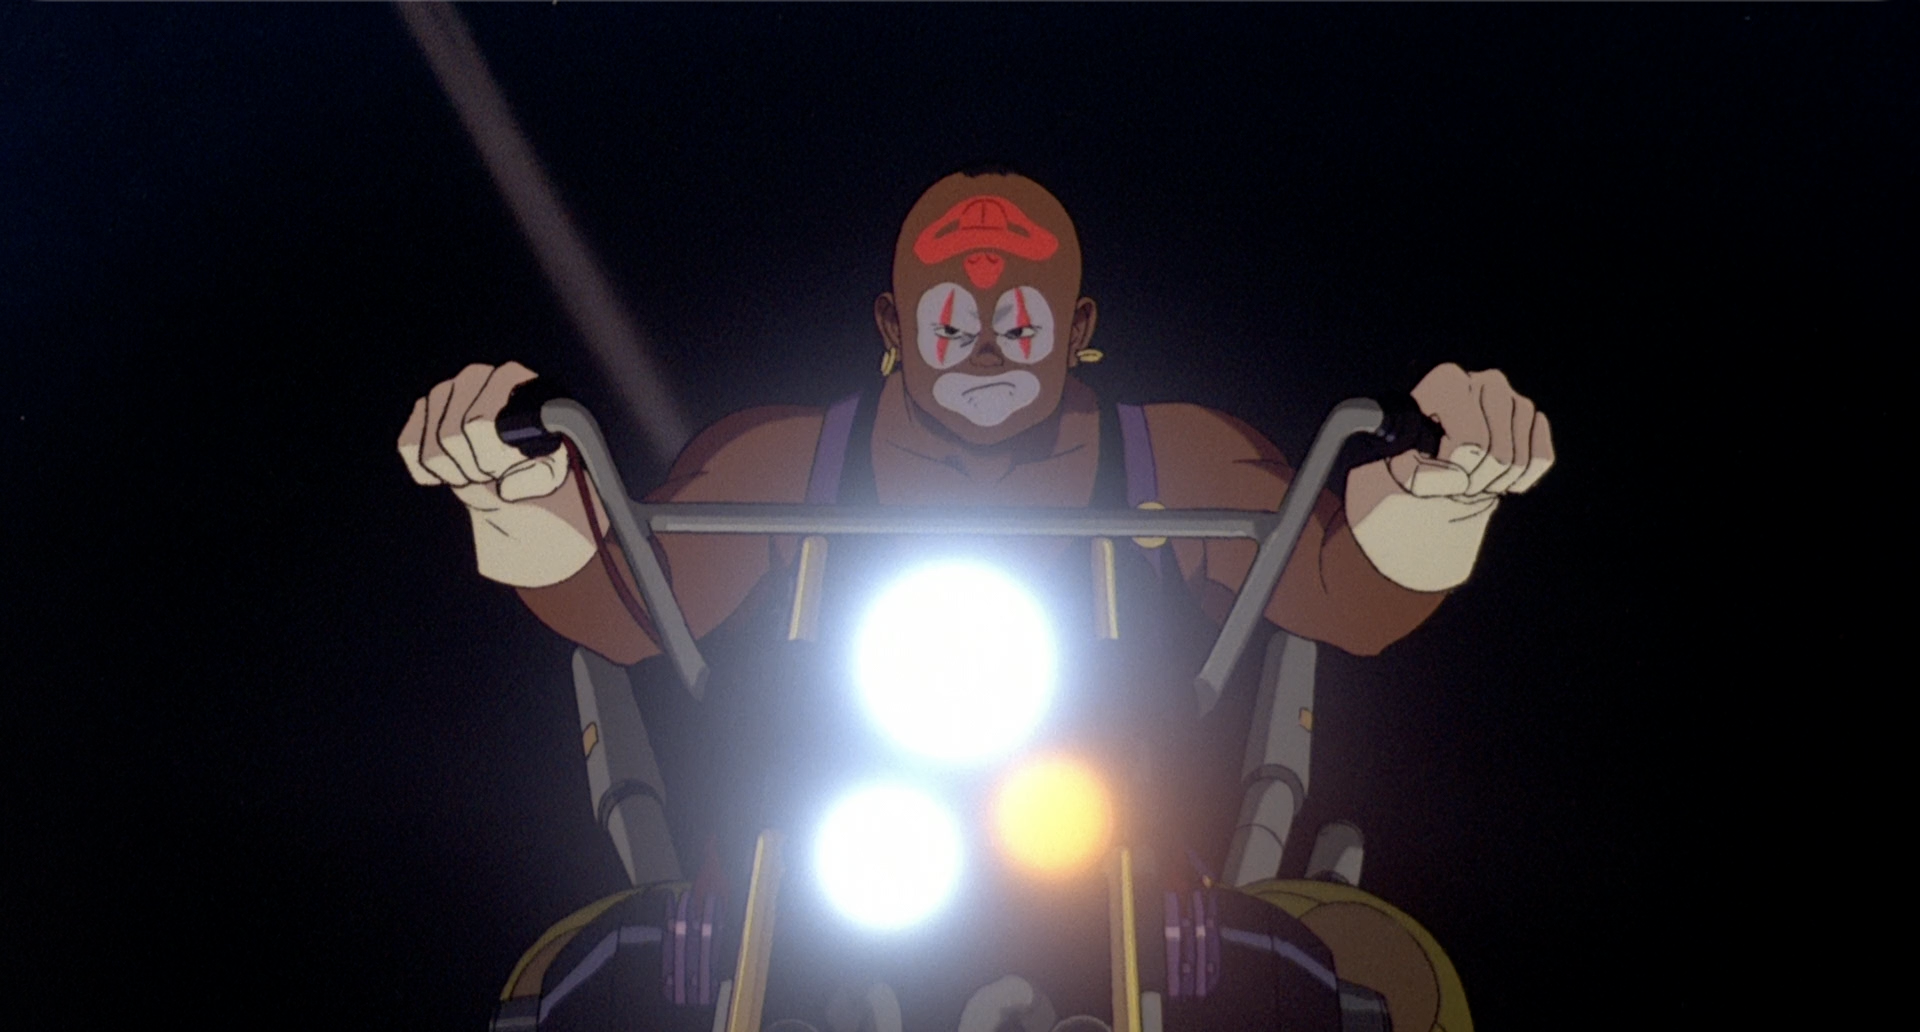
Think of the motorcycle headlights or alleyway signs in Akira, or the Running Man segment from Neo Tokyo (1987), or any explosion, light beam, aura or impact effect you’ve seen in classic anime. It has a certain quality that grounds it to reality. There’s a feeling of danger to it, heightening the action and adding a kind of volume you can sense through the screen.
From the ‘80s onward, it was commonplace. Then the medium shifted toward digital, and it disappeared.
One of my goals with Spirit Jumper was to capture the imperfections of traditional cel-animation production. My belief was that grasping the how and why of the whole production process was the only way to come close to replicating the look.
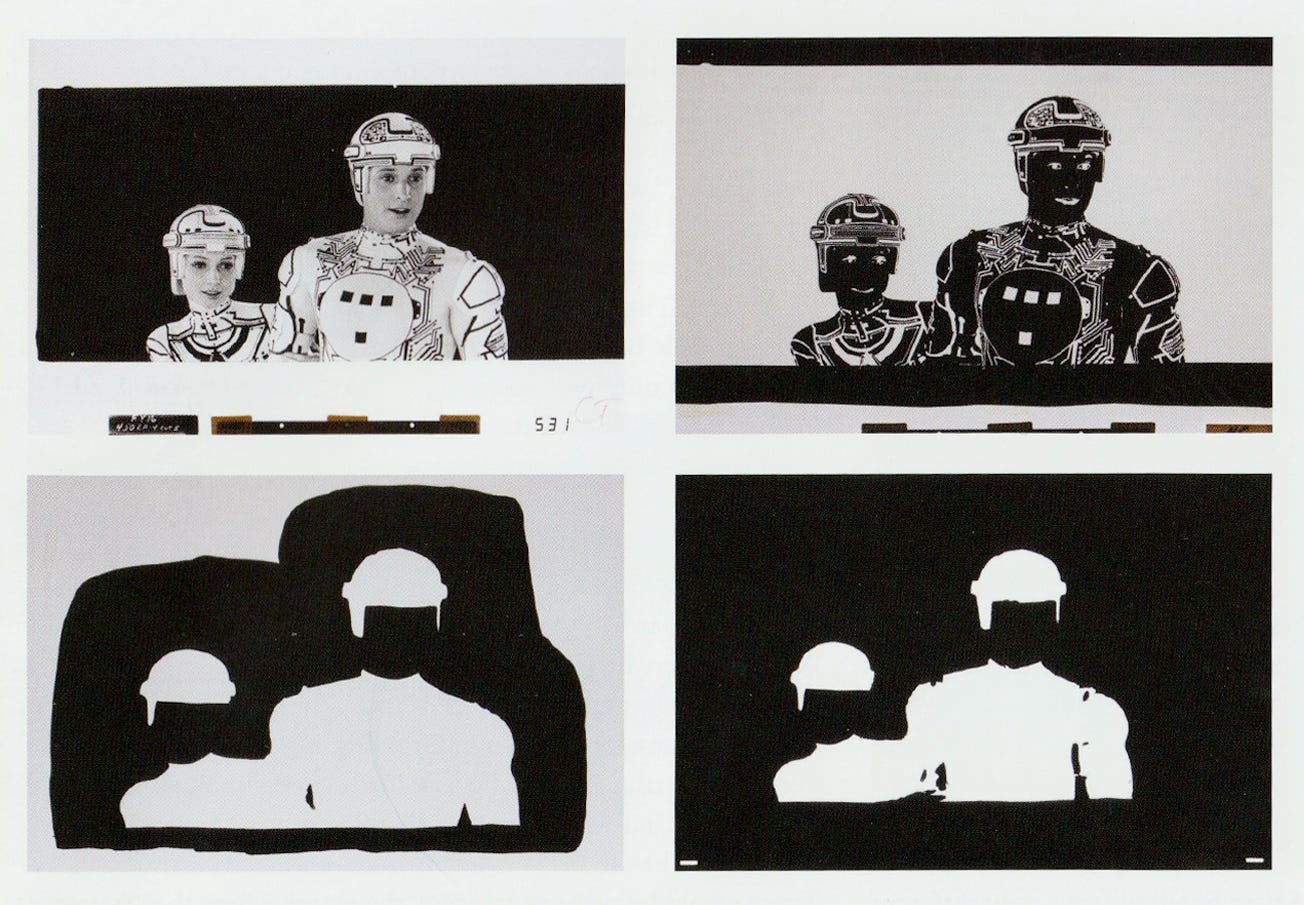
Figuring out light was by far the hardest part, and finding any documentation about how these effects were achieved was equally difficult. Eventually, I learned it was called “backlit animation,” “bi-pack glow” or “underglow,” three terms used interchangeably. In the book Ink & Paint, Disney’s Mark Kimball spoke about how they used backlit animation for the lights in Tron:
The light comes from behind the cel illuminating any clear areas on the cel. By using a holdout matte to temporarily black out areas of the cel not to be illuminated, and placing a colored filter in the front of the camera lens, only the selected portion of the cel will be photographed in that color. This process may be repeated on the same frame using different holdout mattes and different color and diffusion filters until the frame is completed.1
I then came across the most helpful piece of the puzzle from a veteran cameraman, in a forum post I can no longer find:
You have the normally painted animation, and you have a mask for the lighting element which is mostly black, leaving a hole where it shall shine... Repeat for each glowing element with a different color. First you film the animation, then rewind. Second [exposure] is the matte, with a light under the table switched on. Usually you will have a color filter or gel in front of the camera now. This pass will create some lighting with a sharp edge. Sometimes an additional frosted gel is used for blurring that shine, but that takes some light inside the edge of the matte which may not be desired. In that case a third pass is done with the same matte, but out of focus, or with a slightly frosted gel, and/or some additional effects lens.
This unlocked it for me. The look is the sum of multiple, subtle parts. Not just the light, but a combination of light, photography and film stock.
A large part of the look of Spirit Jumper came from processing the animation through film emulation. Most TV animation was shot on 16 mm, while feature or big-budget animation was shot on 35 mm. So, by the point that I was experimenting with light, I’d spent a lot of time researching how film stock affects animation.
When observing still shots from the scenes I referenced, I noticed a distinct series of color shifts from the light source’s edges through its fade-off. It isn’t just fading into transparency; the center light changes color as it fades outwards.
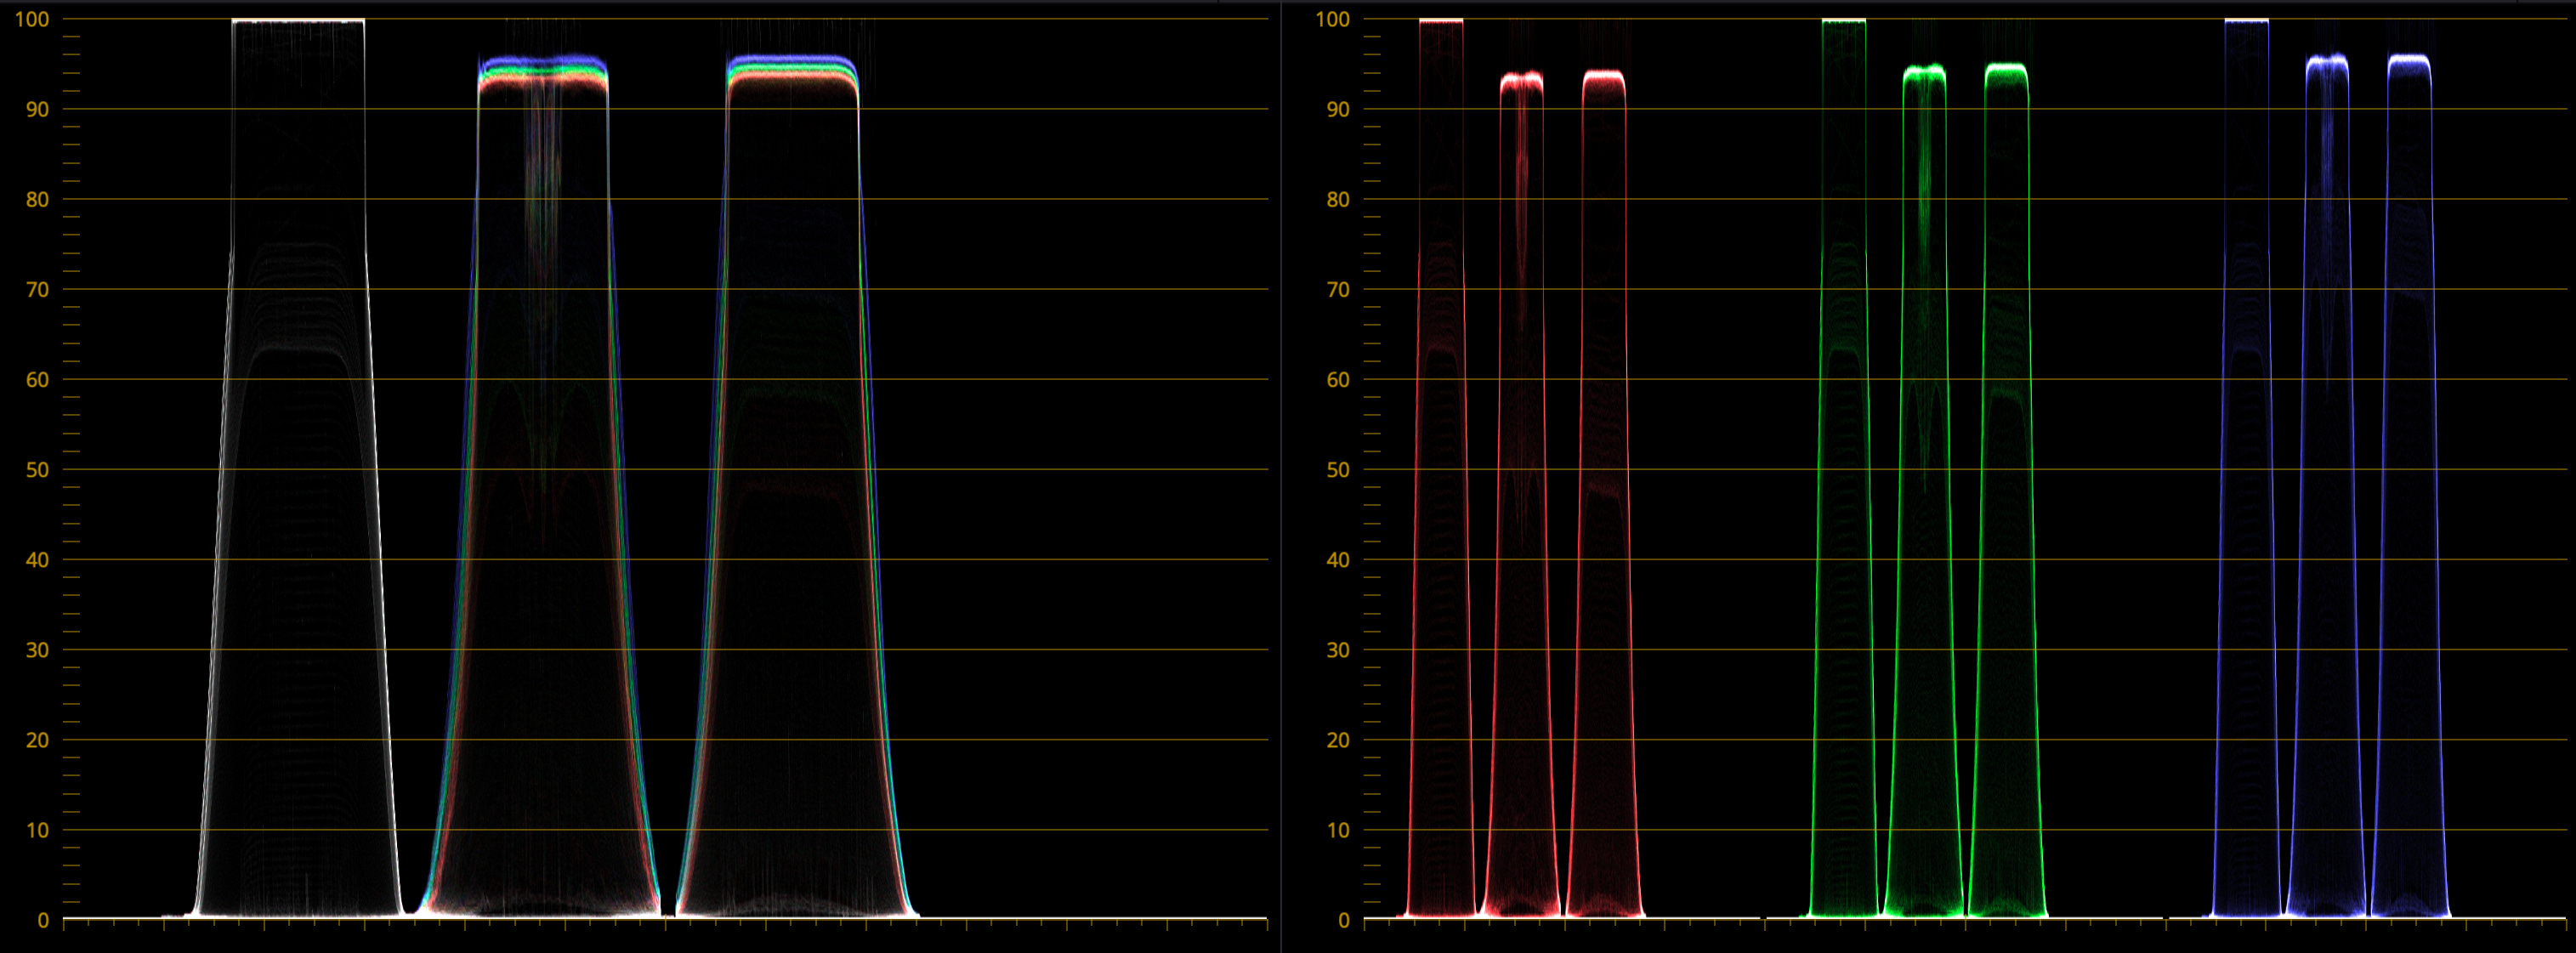
My initial tests to recreate this, using stock glow effects, looked horrible. They were flat. They sat on top of the image instead of inside it. Researching how light falloff occurred made it clear why I was failing. Standard digital glows usually rely on a simple Gaussian blur, which is uniform. They fade gently and evenly, like a gradient. Real light is aggressive. It follows the inverse-square law. It stays hot and dense for a long time before falling off exponentially.
All of the light in Spirit Jumper was made with a plugin called Hawaiki Super Glow for Apple Motion, where I composited the entire film. It generates incredibly realistic glows by stacking Gaussian blurs at different levels. You can then tweak aspects of the glows such as radius, gain and colors, as a group or individually.
This allowed me to copy that color shift I saw in my references, and to generate a natural-looking diffused light around light sources without manually masking them, like the analog technique requires. It looked substantially better than stock Gaussian glow effects. Still, without incorporating film components, it felt like something was missing.
Three crucial aspects of shooting to film contribute to the overall look: bloom, halation and grain. I needed to emulate the specific artifacts of film stock.
When bright light hits real film, it scatters back into the red-sensitive layer. That’s why the brightest explosions in anime often have a red or orange halo around the edges of the source — or why, if they’re colored, there’s a color-value shift in the same spots. It makes the light feel hot. According to the developers at Dehancer, this happens because intense light travels through the emulsion and bounces off the base of the film strip.2

Bloom is the diffusion caused by the light scattering through the emulsion layers themselves, or scattering through the optical filters on the lens. Because blue light waves are shorter and scatter more easily, this diffusion often creates a cool, cyan haze around the white light.
Coupled with the diffusion lenses that were often used to boost this spreading effect, it gave that feeling of “dreaminess” to movies. As also described by Dehancer:
While the bloom effect is not directly related to the film itself, film makes it particularly attractive. Additional light scattering occurs in slightly inhomogeneous layers of emulsion and further this diffusion is amplified with development.3
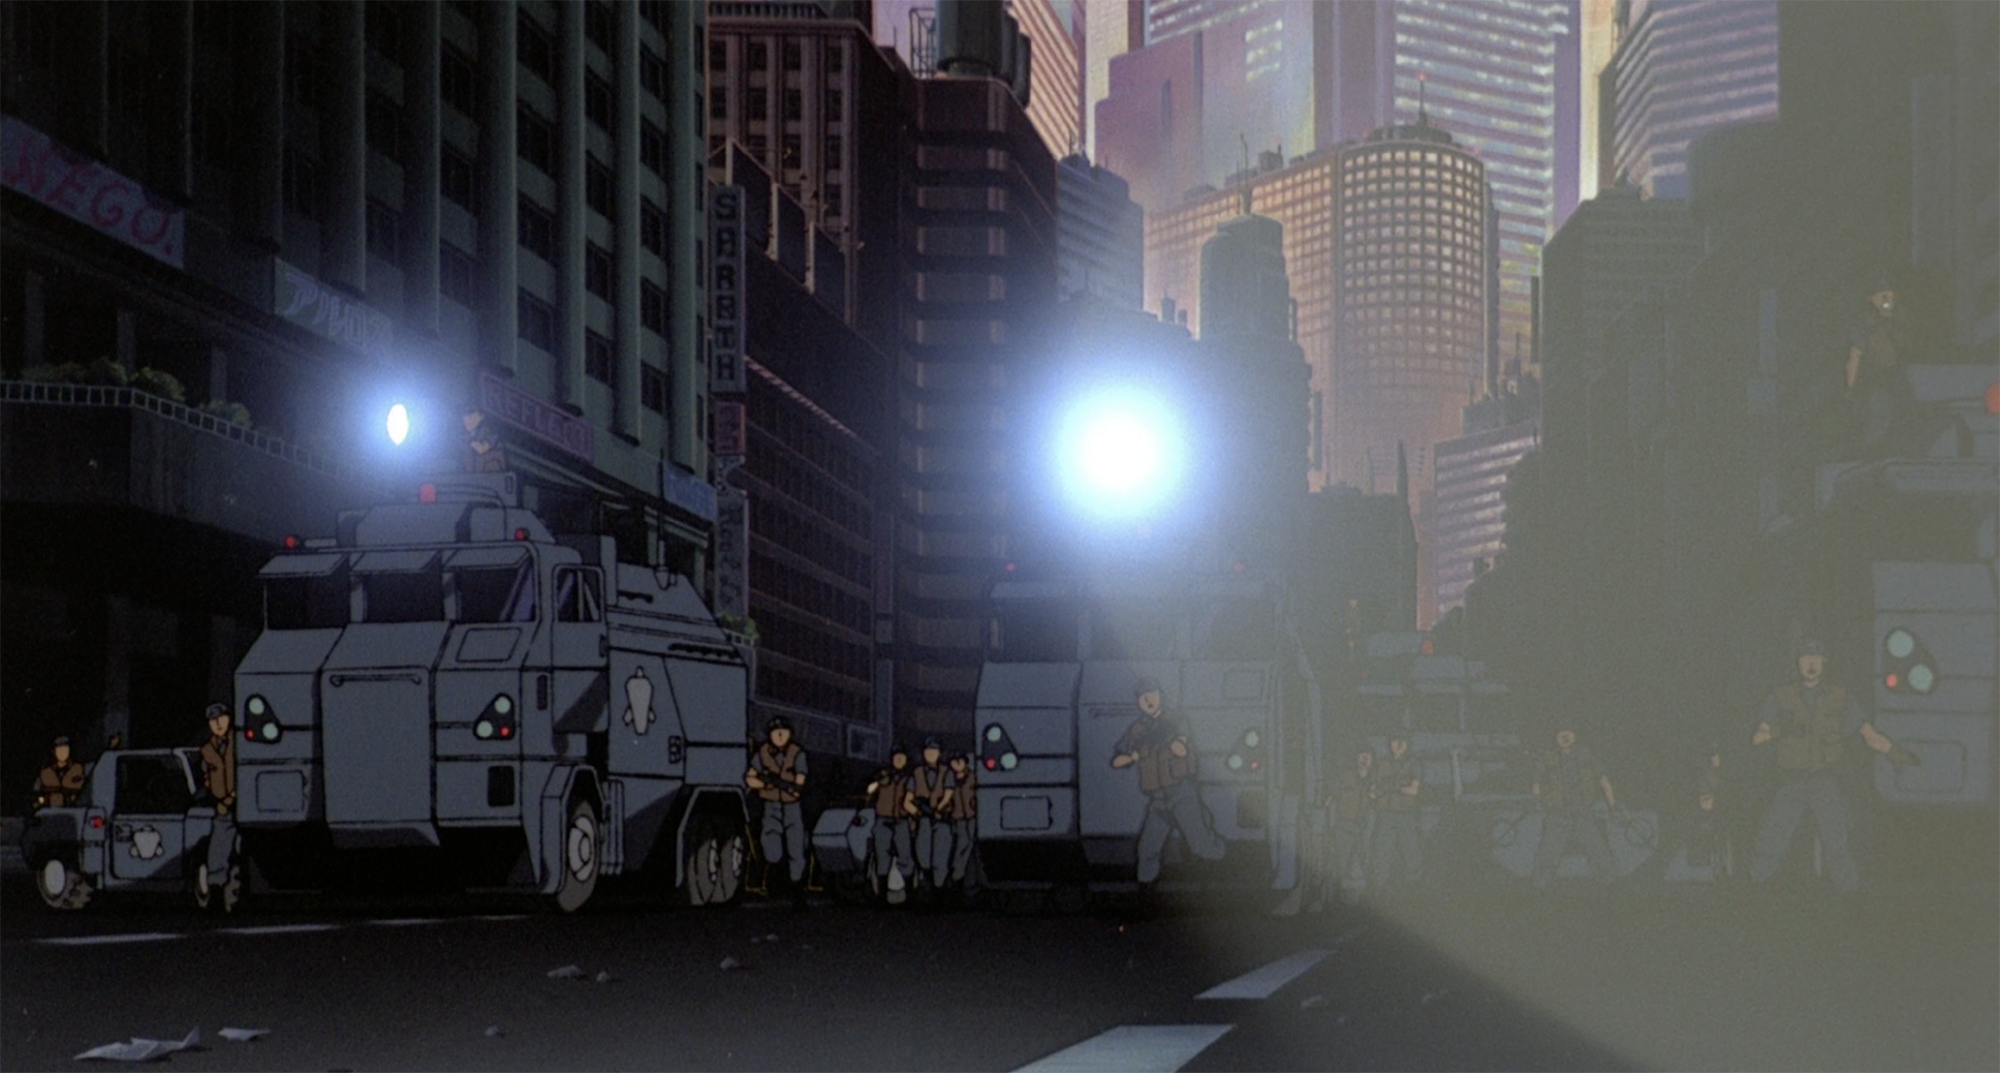
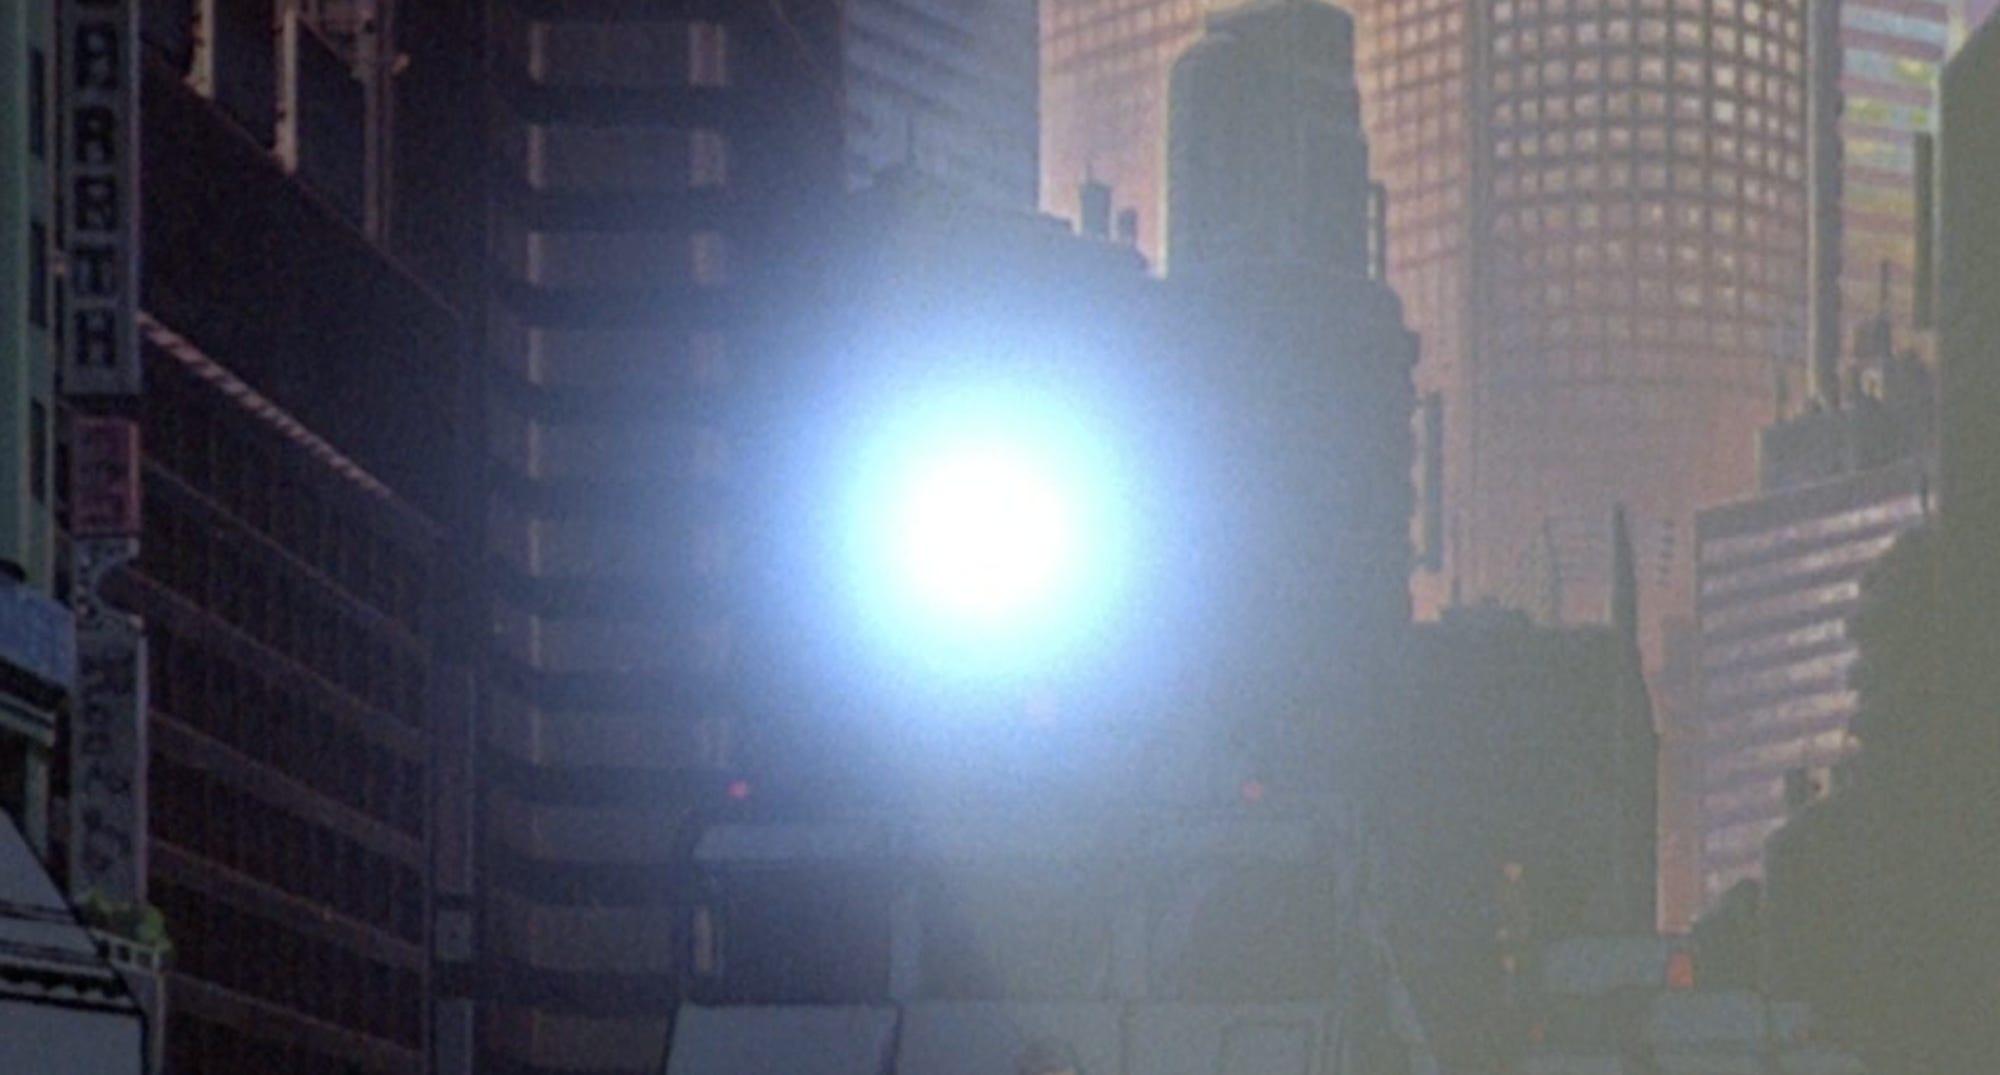
It’s worth noting that halation doesn’t always occur when bloom does. In the Akira example, despite the visible bloom, there isn’t any red shift around the brightest whites.
Why? Since bloom initiates at the lens and upper emulsion layers, while halation occurs at the film base, they are independent events. Because the film stock possessed a “remjet” backing, it prevented the halation (reflection from the rear) while still allowing the optical diffusion (scattering at the front) to occur.4
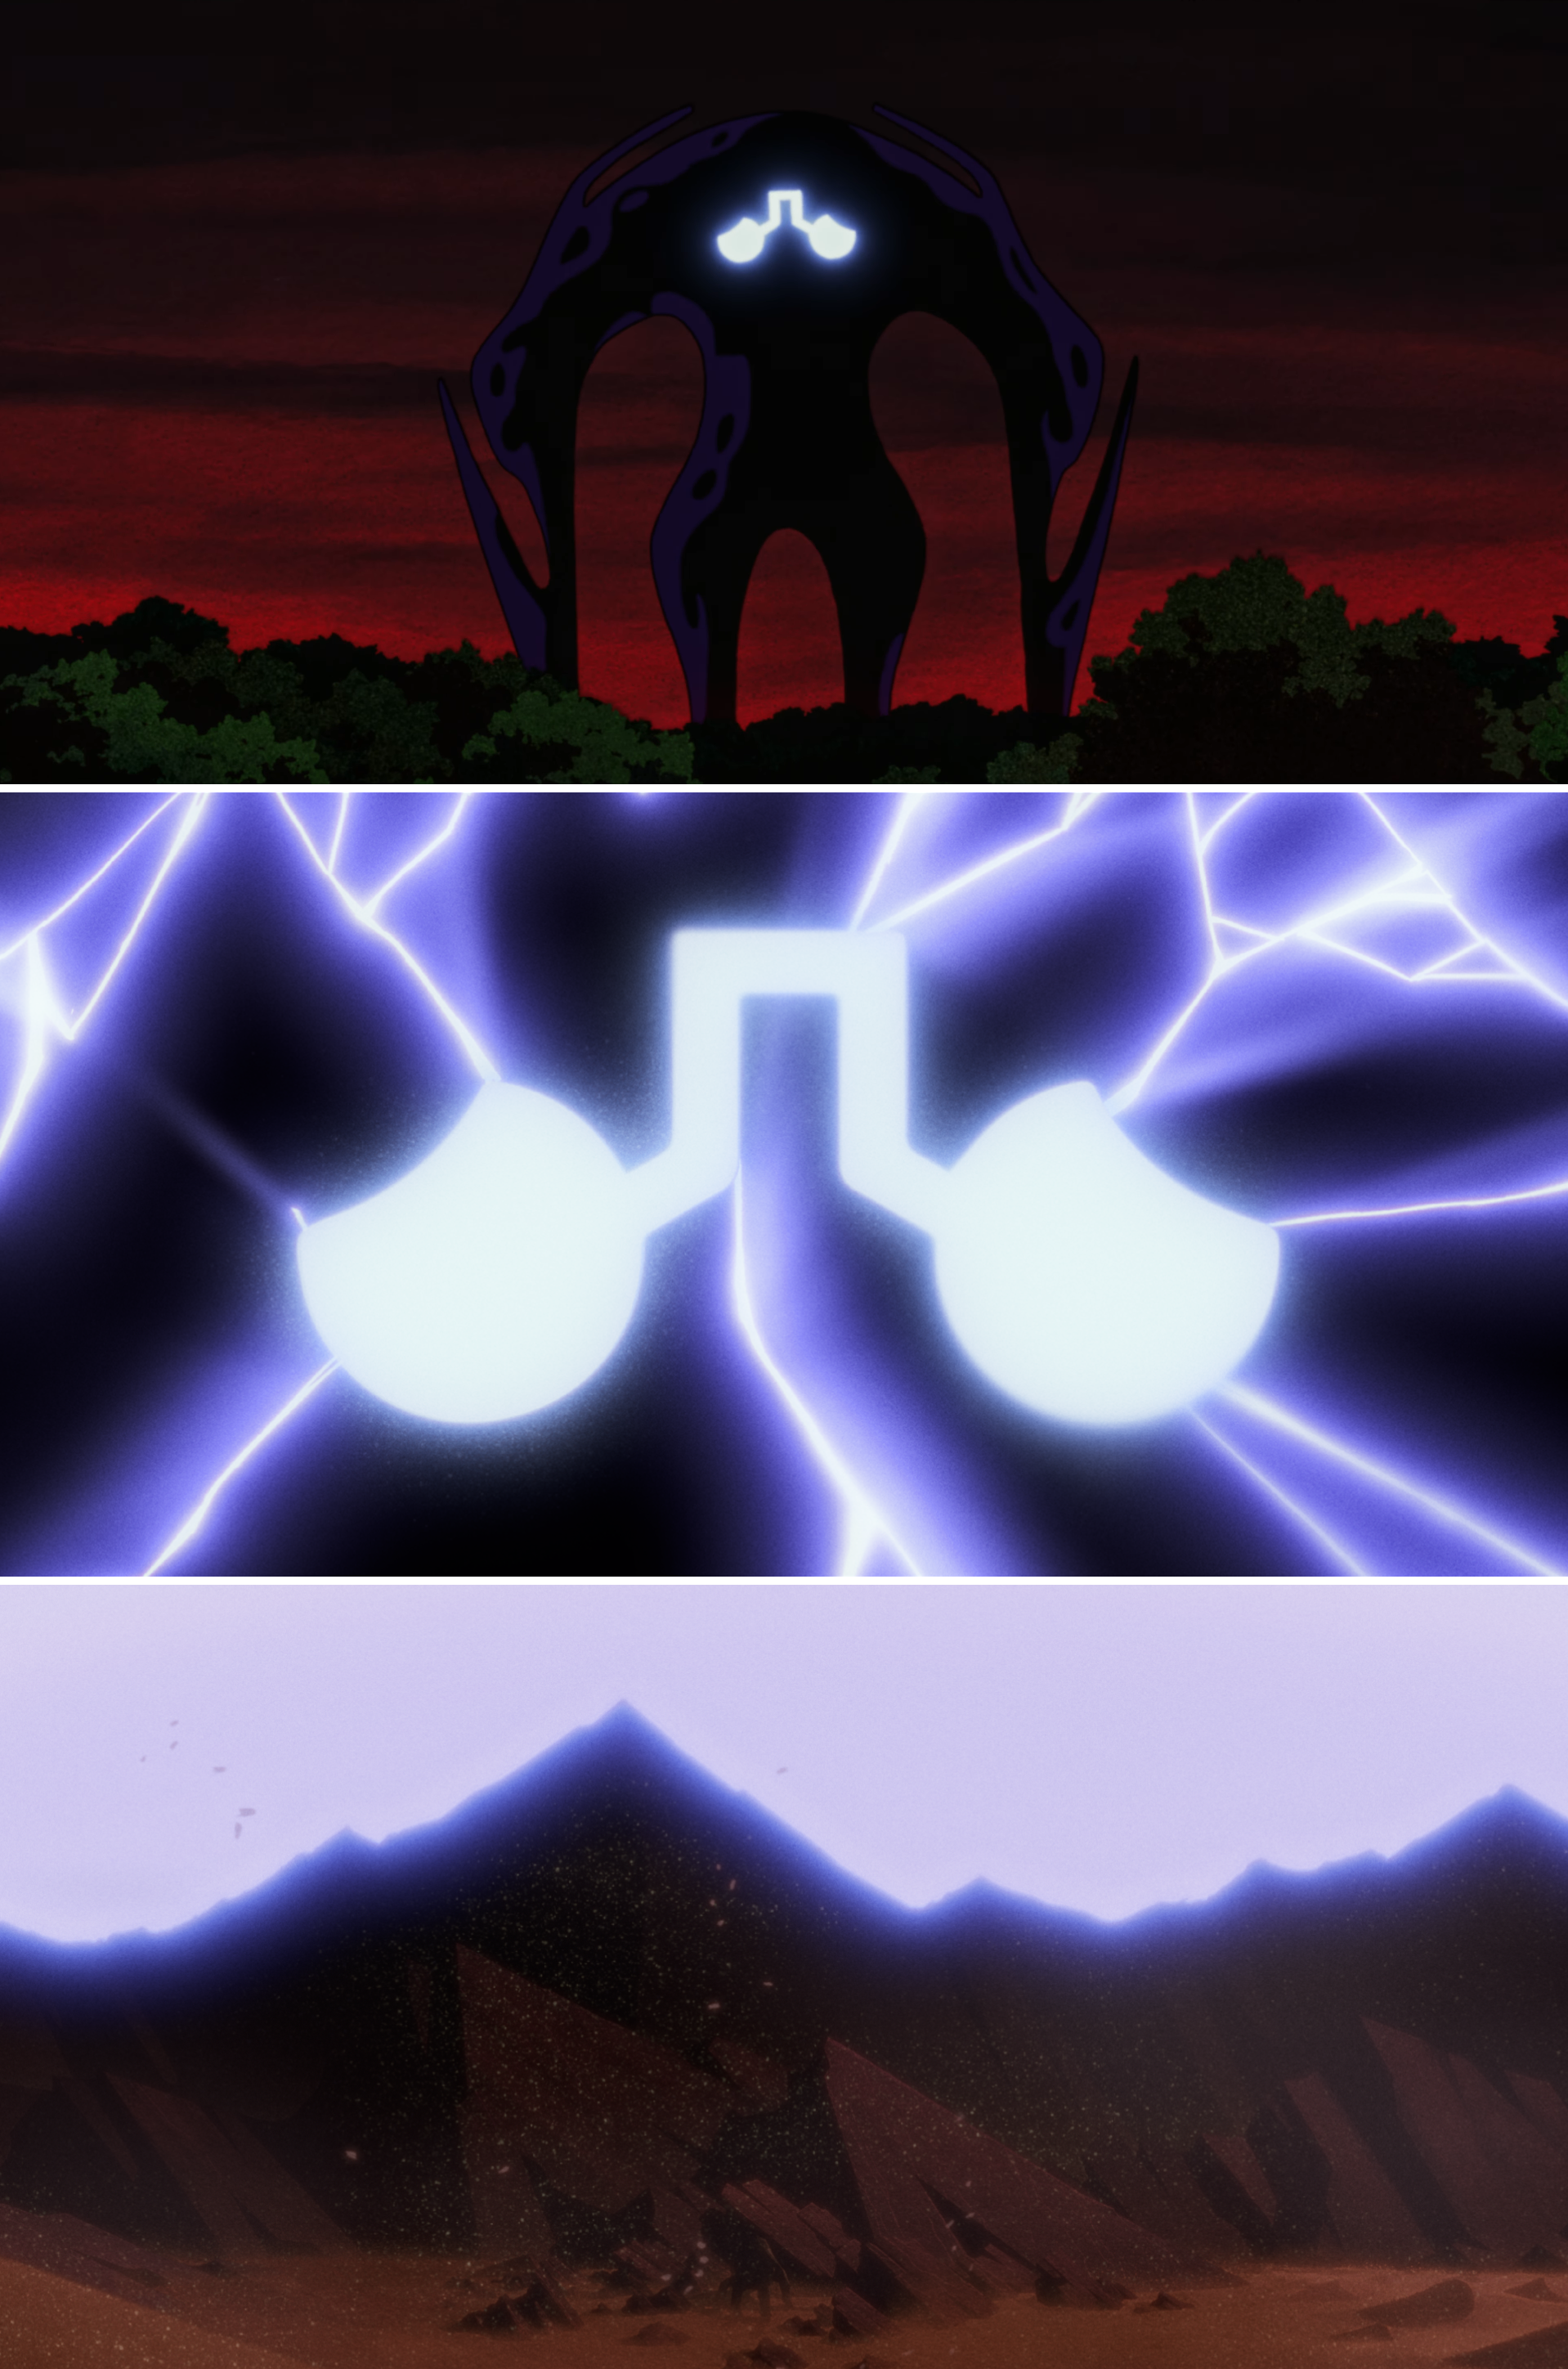
The last effect, grain, which is added on top of the entire film, brings more texture to the glow, pushing it even further away from feeling digital and sterile. Combined, the image becomes color shifted, diffused and textured. As soon as I began processing the light effects into the film emulation, the light came together.

In Spirit Jumper, I applied this technique to every instance of high-intensity light from the explosions and the monster’s glowing eyes, to make them feel as authentic as possible.
Ultimately, you don’t need a degree in chemistry to achieve this look. You don’t need to understand the physics of why any of it happens. You just need to know what to look for. The key isn’t simulating the science perfectly, but training your eye to recognize the character of analog light through film, so you can recreate the feeling of it.
There’s a sense of irony about trying to recapture this look, in that we’re now fighting the medium from the opposite end. Throughout the ‘80s and ‘90s, the camera operators were constantly battling dirt to make something clean and presentable. In a digital production pipeline, the computer makes the image perfect at every step. To create something that feels natural, you have to fight to put the dirt back in.
It’s the only way to get that “dangerous” light, the kind that actually feels like it’s burning the screen.
St. Louis producer spktra (Josh Fagin) spent five years directing the hand-drawn music video for his debut single, “Spirit Jumper.” Channeling “Batman: The Animated Series” and “Angel’s Egg,” the film features character designs by “Batman Beyond” veteran Glenn Wong. Fagin directed, edited and composited the visual himself to match the song’s distinct texture, which he wrote using custom audio plugins he coded and released through his company, Noir Labs. Find him on YouTube, Spotify, Instagram and Apple Music.
Until next time!
Mindy Johnson, Ink & Paint: The Women of Walt Disney’s Animation (Disney Editions, 2017).
“Bloom: What It Is and How It Works,” Dehancer Blog.
Carlos Garcia, “What Is the Rem-Jet (REMJET)?”
Thanks John & Jules for letting me write about this for everyone!
Fun to have such a technical post! The approach of stacking Gaussians at different radii to create a particular falloff is also used in bloom in realtime games now, though often with a more efficient technique like dual kawase blur as the basis rather than a strict Gaussian kernel per se. (Guess what I'm currently implementing in my game haha...)
I think part of the initial problem here might have been doing the bloom in a gamma space, rather than in a HDR linear space prior to tonemapping. Pixels that clip to white might represent different amounts of underlying energy. Working with PBR pipelines in linear space makes bloom look a lot more natural in modern games than the excessive bloom era of the 2000s.
Anyway, nice writeup, really cool seeing people put in the effort when it comes to compositing. Perhaps aspects of the 'classic anime look' can return outside of just nostalgia pieces... a girl can hope, anyway.